How to Open Windows Vista Recovery Environment (RE) Console from Installation CD
Installation DVD of Windows Vista contains a new Windows Recovery Environment (aka Windows RE), which completely replaces the recovery console in Windows XP. Commonly known as Recovery Manager, Windows RE is a recovery platform based on Windows Preinstallation Environment (Windows PE), and supersedes most functions or tasks from recovery console. Windows RE provides two main functionalities:
- Automatic diagnosis and repair of boot problems using a tool called Startup Repair.
- A centralized platform for advanced recovery tools such as command prompt and ability to restore to a System Restore points.
As mentioned, Windows Recovery Environment or Windows RE is stored on Windows Vista installation setup DVD, and end-users will have to boot up from the DVD to access the Windows RE and Startup Repair. For users using OEM-made computers, most Windows RE already pre-installed on the hard disk in recovery partition or EISA partition, which is accessible via a function key on system startup. In you’re in a corporate with Software Assurance or Volume licensing, Windows RE may be available for network boot via a WDS server.
This guide details the steps with illustrations on how to access and open Windows RE Console using Windows Vista installation DVD.
- Restart the computer, and press a function key (depends on motherboard manufacturer or OEM brand) to go to CMOS’s BIOS configuration.
- Set the boot device ranking or priority so that the first device to boot will be CD/DVD optical drive.
- Save the CMOS.
- Shutdown the computer.
- Insert the Windows Vista installation DVD into DVD drive disc tray. Windows Anytime Upgrade DVD can be used in the case that user don’t have normal installation DVD.
- Power on the PC.
- On some system, user requires to press any key to boot from CD or DVD disc drive, even though first boot device has been set to CD or DVD drive. So read the text on screen carefully, and press any key if applicable.
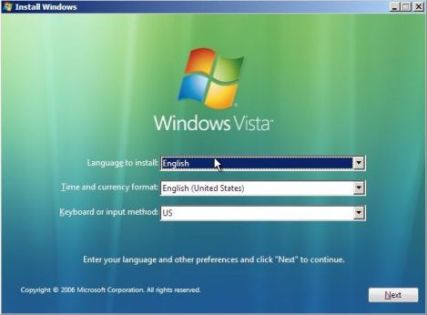
- System will start to load files, and once loading completes, “Install Windows” screen will be displayed. Select and choose appropriate Language to install, Time and currency format, and Keyboard or input method, then click on Next button.
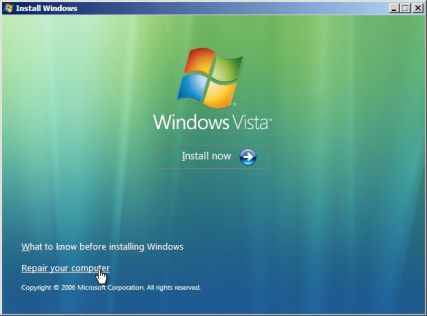
- The next screen has options to “Install Now”, learn “What to know before installing Windows”, or “Repair your computer”. Click on Repair your computer.
- “System Recovery Options” will then search for all Windows installations on the system. If the system is dual-boot or multi-boot systems with many operating system installed, more than one item would be displayed. However, for most users, there should be only one Windows installation found, Microsoft Windows Vista which is highlighted by default. Else, select the installation of OS that you want to recover or access in the Windows RE, and then click on Next button.
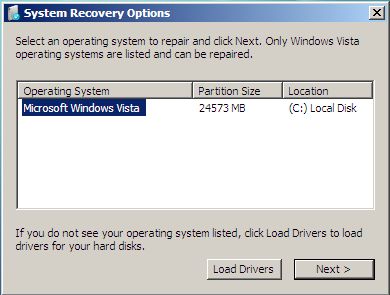
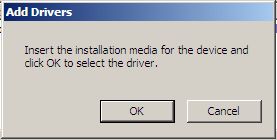
If you’re hard disk is a SATA (Serial ATA), SATA II or SCSI interface which requires additional driver to Windows RE to recognize the disk, insert the installation media or driver disc for the device, and then click on Load Drivers to select the driver to add the drivers to the recovery session.
- Windows Vista Recovery Environment, which assumes your computer was unable to start, may automatically start Startup Repair to scan the Windows installation selected to detect any error found and fix any problem found. If you run Windows RE and Start Up Repair before, this scenario may be skipped.
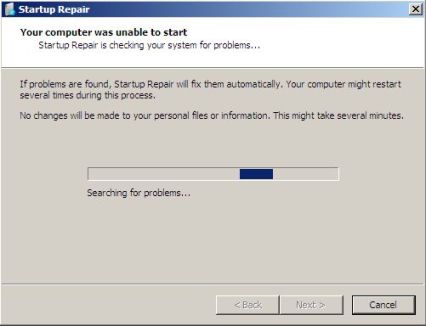
Click on Cancel and then follow by Yes button on the confirmation dialog to terminate and stop the Startup Repair process. After this, “System Recovery Options” which is Windows Recovery Environment will appear.
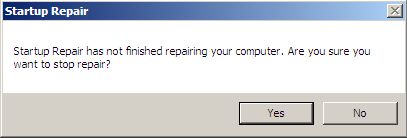
The rest of the information on this step is for information purpose to describe what will happen if user doesn’t terminate the Startup Repair and let it run its course.
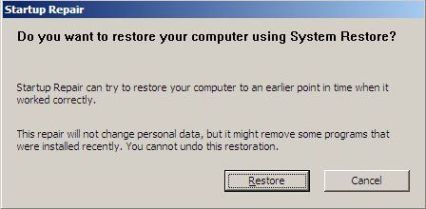
If you’re not terminating the Startup Repair, it may offer to restore computer using System Restore to earlier point in time. Click on Cancel to skip the restore with System Restore. If you click on OK, system will be automatically restore to previous Restore Point, and it manages to fix any problem ‘assumed’ by Startup Repair, you may not get to Windows Vista Recovery Environment.
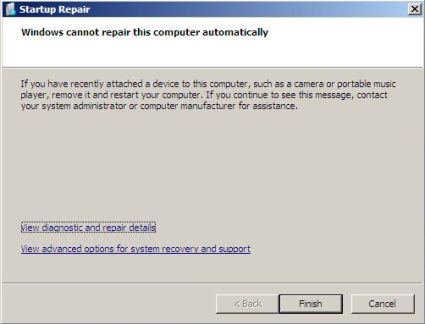
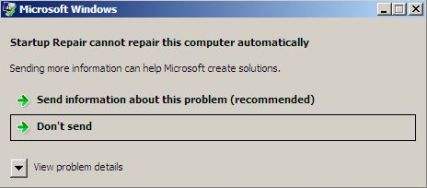
When all recovery attempts by Startup Repair fails, it will offer to send information about the problem (curiously, where is the problem?) to Microsoft, click on Don’t send (as you probably don’t have Internet connection too. Then another screen will tell user that Windows cannot repair this computer automatically. Click on Finish button.
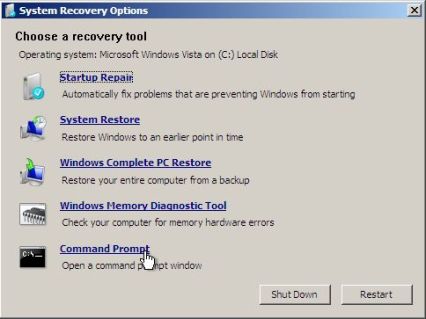
- The “System Recovery Options” which is Windows RE or previously known as Windows Vista Recovery Console will be displayed. The screen offers tools such as Start Up Repair, System Restore, Windows Complete PC Restore, Windows Memory Diagnostic Tool and ability to open a Command Prompt.
Recent Articles
- How To Download HBO Shows On iPhone, iPad Through Apple TV App
- Windows 10 Insider Preview Build 19025 (20H1) for PC Official Available for Insiders in Fast Ring – Here’s What’s News, Fixes, and Enhancement Changelog
- Kaspersky Total Security 2020 Free Download With License Serial Key
- Steganos Privacy Suite 19 Free Download With Genuine License Key
- Zemana AntiMalware Premium Free Download For Limited Time


